

How is RetroFoam Installed in Exterior Walls with Vinyl and Aluminum Siding? (Quick Answer)
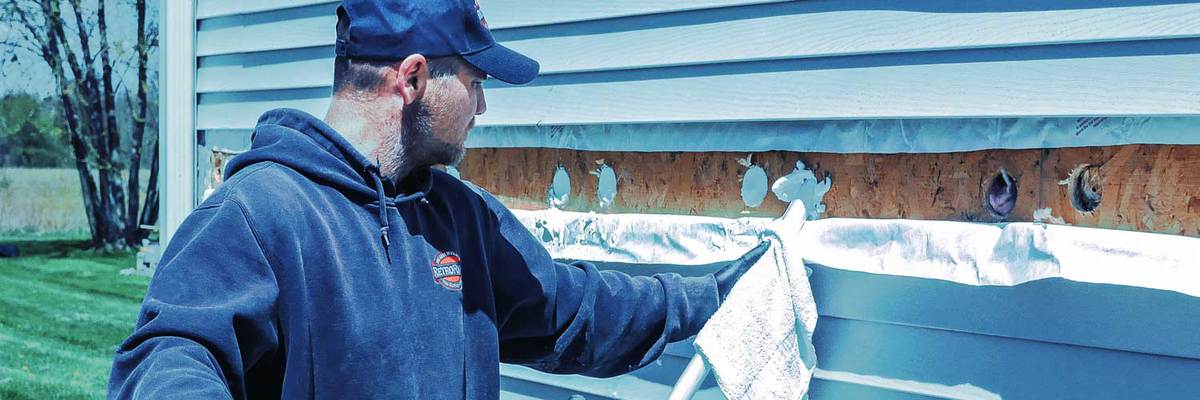
The installation process for vinyl and aluminum siding is the same. First, a row of siding is removed all around the home, then 2 ½-inch holes are drilled into each wall cavity. The RetroFoam injection foam insulation is injected into each cavity, the holes are plugged, and the siding is replaced.
Let’s take a more in-depth look at the process to install RetroFoam insulation into existing walls with vinyl and aluminum siding.
Your existing exterior walls need insulation, and you’ve landed on RetroFoam injection foam insulation as the best option for your home.
You’re tired of dealing with the cold drafts, uncomfortable rooms, and high energy bills because there is little to no insulation in your exterior walls. Injection foam insulation creates an air seal to help solve those problems, but how is RetroFoam installed in exterior walls with aluminum or vinyl siding?
RetroFoam has been working with homeowners across the country to solve issues with comfort and energy efficiency. This means our dealers work with all kinds of siding types, from vinyl and aluminum to brick, wood, and stucco.
Educating homeowners on all things RetroFoam is kind of our thing, so let’s dive right in on how injecting foam insulation in existing walls with vinyl and aluminum siding is done.

Injecting Foam Insulation into Existing Walls with Vinyl and Aluminum Siding
Adding injection foam insulation to walls from the outside for homes with vinyl and aluminum siding is relatively easy.
Before we jump into how it’s done, let’s briefly talk about what’s already in there because, in some cases, it can slightly change the installation.
If there is fiberglass in your walls, nothing needs to change in the installation. This is because the RetroFoam compresses the fiberglass as it fills the cavity. If you have cellulose in your walls, there’s an added step before the foam is injected.
If there is loose-fill cellulose in your walls, the installation crew will remove a row of siding towards the bottom and drill a hole into each wall cavity to vacuum it out. This is done because the cellulose can block the injection foam from filling the cavity completely.
Now let’s talk about the rest of the installation process.
The process of installing RetroFoam injection foam insulation is the same whether your home has vinyl or aluminum siding.
The installation can be done without drilling through siding by just removing a row around the entire house.
After the siding has been removed, a 2 ½-inch hole is drilled into each wall cavity. A member of the installation team then runs a tool up and down the cavity to look for any obstructions in the wall. They also feel for the next stud to have a good feeling for the size of the cavities.
If obstructions are found in the cavity, another row of siding is removed above or below it, depending on its location, and another hole is drilled. This is done to ensure the cavity is completely filled.
Once this is done, it’s time to inject the RetroFoam.
The installer will run the injection hose from the top of the cavity to the middle while injecting the foam. Next, they will run it from the bottom up. This technique ensures the foam gets into all of the nooks and crannies.
After the RetroFoam has been injected, the holes are plugged, and the siding is replaced. The installation crew cleans everything up, leaving your home looking just like it did before they arrived.
Learn More About Injectable Foam Insulation for Existing Homes
Do you have more questions about RetroFoam home insulation and how it’s installed?
Check out the Install Process page on our website.
You can also check out our Learning Center, where you’ll find tons of resources to help you along your RetroFoam insulation educational journey.
Related Articles
How to Tell if There is Insulation in the Wall
How Do RetroFoam Installers Know the Cavity is Full When Insulating Existing Walls?
What is the Difference Between RetroFoam Injection Foam and Spray Foam Insulation?