

Spray foam insulation is celebrated for its efficiency and durability in homes.
It's a champion in sealing nooks and crannies, making homes more energy-efficient. However, there are times when you might need to remove spray foam, whether due to application issues, remodeling needs, or damage repairs.
Let's dive into the ins and outs of spray foam removal, ensuring you're equipped with the knowledge and tools for this task.
Understanding the Types of Spray Foam
Before you start removing spray foam, you must know what type you're dealing with.
There are three main types:
- Open Cell Spray Foam: This is the most pliable and most manageable to remove.
- Canned Foam: A bit more challenging to remove than open cell.
- Closed Cell Spray Foam: The most robust and most challenging to remove.
Remember, spray foam is designed to be a permanent solution, so removal is more complicated. Professionals with specialized equipment usually install it.
Tools for Spray Foam Removal
When it comes to removing spray foam insulation from your home, starting with hand tools is often the best approach. These tools are not only readily available but also offer precision and control, minimizing the risk of damaging your home's structure. From serrated blades ideal for slicing through foam to the unexpected utility of equestrian curry combs for tougher closed cell foam, each tool has its unique application.
In other cases, you may need to turn to power tools to get the job done.
Let's explore the various hand tools and power tools at your disposal and how best to use them for efficient and safe spray foam removal.
Hand Tools
For a start, hand tools are your go-to option:
- Serrated Blades: Bread knives or other serrated blades effectively cut through foam. Special insulation knives are available but may struggle with thicker foam.
- Flat Bars and Putty Knives: Useful for prying or popping off foam, especially in open areas.
- Curry Combs: Surprisingly, these equestrian tools are excellent for shaving off closed cell foam.
In some cases, you can use your hands to remove large chunks, particularly with open cell foam. Just be cautious of underlying materials like wood and nails.
Power Tools
Power tools should be used with caution to avoid damaging your home's structure:
- Power Drill or Grinder with Wire Wheel: Ideal for removing large amounts of closed cell foam.
- Reciprocating Saws with Special Attachments: These can cut foam flush with studs, suitable for specific removal tasks.
- CI Cutters: Heavy-duty machines for shaving foam back to the studs.
How to Remove Spray Foam Insulation
Embarking on the task of how to remove cured spray foam from your home requires more than just determination—it demands a methodical approach and a keen eye for safety.
In this section, we provide a detailed step-by-step guide to help you through this process.
Starting with the crucial step of identifying the type of foam you're dealing with—be it open cell, canned, or closed cell—to selecting the most suitable tools for the job, we've got you covered.
We delve into the techniques of cutting or prying the foam, stressing the importance of caution to preserve your home's integrity. For the more stubborn closed cell foam, we discuss when and how to bring power tools into the equation.
But the job doesn't end with foam removal. We also guide you through the often-overlooked, yet essential, clean-up process.
Prepare to arm yourself with knowledge and tools for a successful and safe removal of spray foam insulation.
Step-By-Step Guide
- Identify the Foam Type: Determine if it's open cell, canned, or closed cell foam.
- Choose the Right Tool: Based on the foam type, select an appropriate tool.
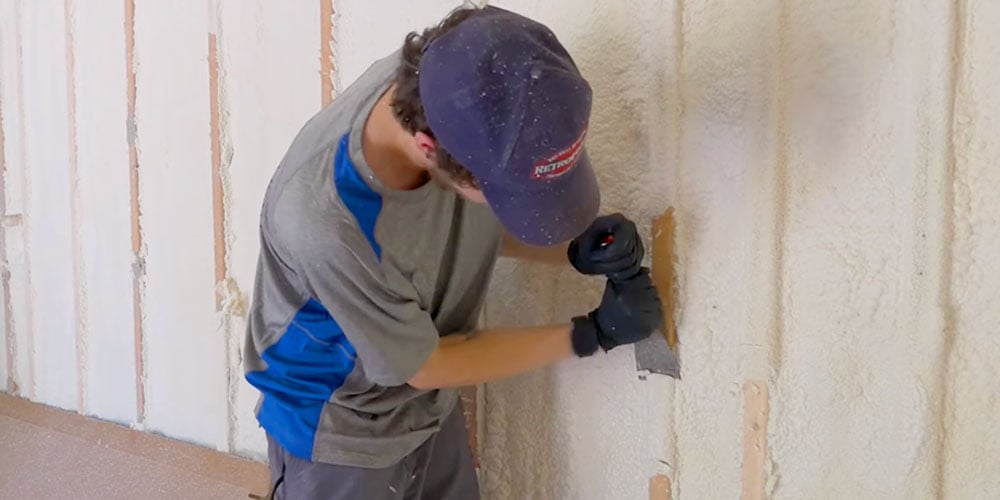
- Cut or Pry the Foam: Use serrated blades or putty knives to remove the foam. Be gentle to avoid damaging underlying surfaces.
- Use Power Tools if Necessary: A power drill or grinder can be effective for tougher closed cell foam.
- Clean Up: Be prepared for a messy process. Have a vacuum, brooms, and dust pans ready for cleanup.
Safety Considerations
- Wear Protective Gear: Gloves, goggles, and a mask are essential to protect yourself from foam particles.
- Work in a Ventilated Area: Ensure good airflow to avoid inhaling any particles.
- Be Cautious with Power Tools: Avoid damaging structural elements like studs.
Commercial Products for Professional Use
Commercial products like reciprocating saws with foam-cutting jigs or CI cutters might be necessary.
Professional contractors typically use these tools.
Tackling Spray Foam Removal in Your Home
Removing spray foam insulation is different from a typical DIY project due to its permanent nature.
However, understanding the types of foam and the appropriate tools can make the process manageable. Always prioritize safety and be prepared for a thorough cleanup. For more detailed information on foam insulation and home energy efficiency, visit our Learning Center, where you'll find a wealth of resources to guide you.
Related Articles
How Long Does Home Insulation Last?
How Often Should You Insulate Your House?